
Frank costume
Making costumes is fun! Fun, but worrisome. What if it looks like you’re just wearing a garbage bag – what if people think you’re dressed as literal garbage?
I mean, maybe you are dressed as garbage, and that’s okay. In that case, good job! But me, I wasn’t dressing as garbage.
No, I wanted to be Frank from Donnie Darko, complete with his bunny outfit.

(Frank's the one on the right)
The most distinctive thing about Frank is his mask. Conveniently it was also the most likely point of failure. Which made it a good place to start – if it turned out terribly, I could always fall back on my garbage idea.
Making Frank’s mask
The first step was to figure out what I was making. So out came the old notebook and a trusty pen.

Even when pencils are actually in the way, I prefer to draw in pen — it's more metal
Once the various angles were documented, it was time to commence fabrication – using a tried and true method called winging it.
But how to form the mask? I knew I’d be using polymer clay, but I wanted something to build off of – a wire-frame, if you will. I briefly considered using coat hangers, but my coats need those. Adjourning to Michael’s instead, it turns out they have something called “craft wire”, which comes in various gauges, wound in a circle. I settled on a 12 and a 14 gauge wire; 12 was coat hanger thick, and 14 slightly thinner.
After twisting the wires in place, I hot glued the joints as well.
Some wire and hot glue later
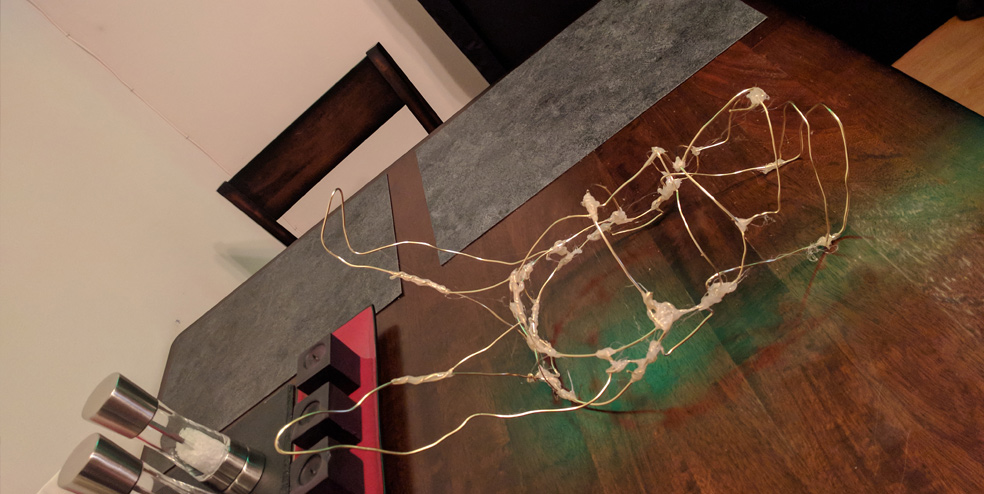
You may notice some rectangular loops – one on each side, near where the eyes would be, and one at the top. This is a rare example of planning ahead. I knew I’d need some way to keep it on my face, and decided on three-point elastic system. I wanted the connection points to be build into the framework, so I added those loops to the wire-frame.
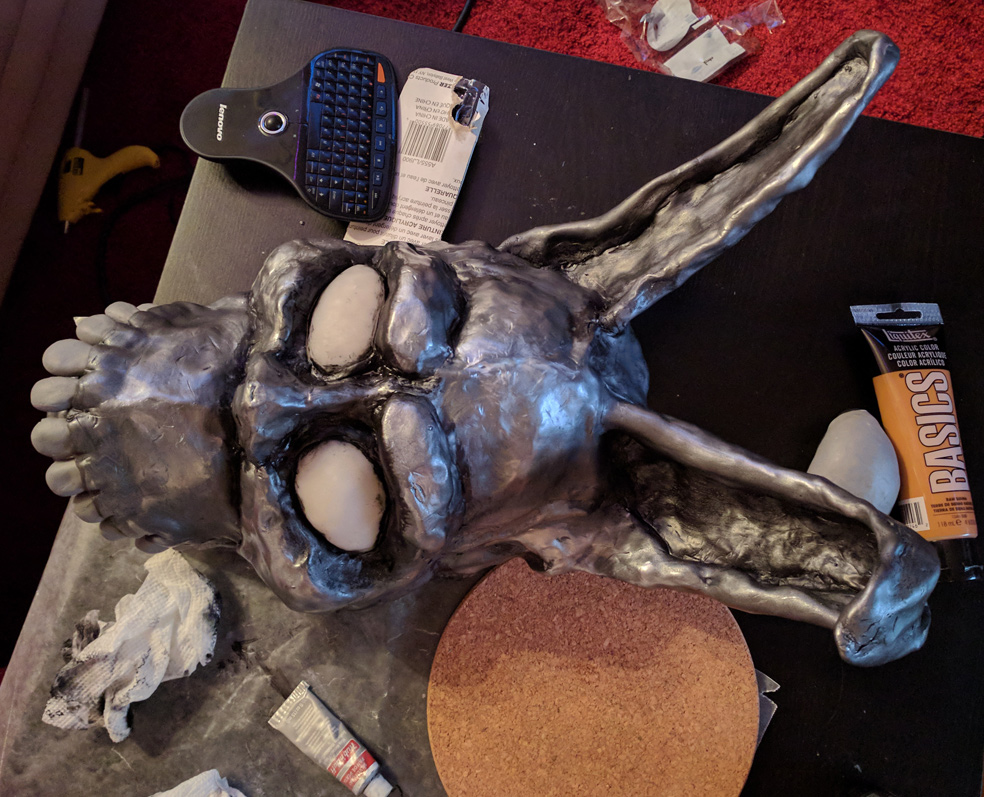
Next, I wanted to fill it in, to give the polymer clay something to sit on. You know, so it didn’t droop through the gaps under its own weight. I wrapped the frame with aluminum foil, and used excess foil to build up mass in places like the brow and cheeks.
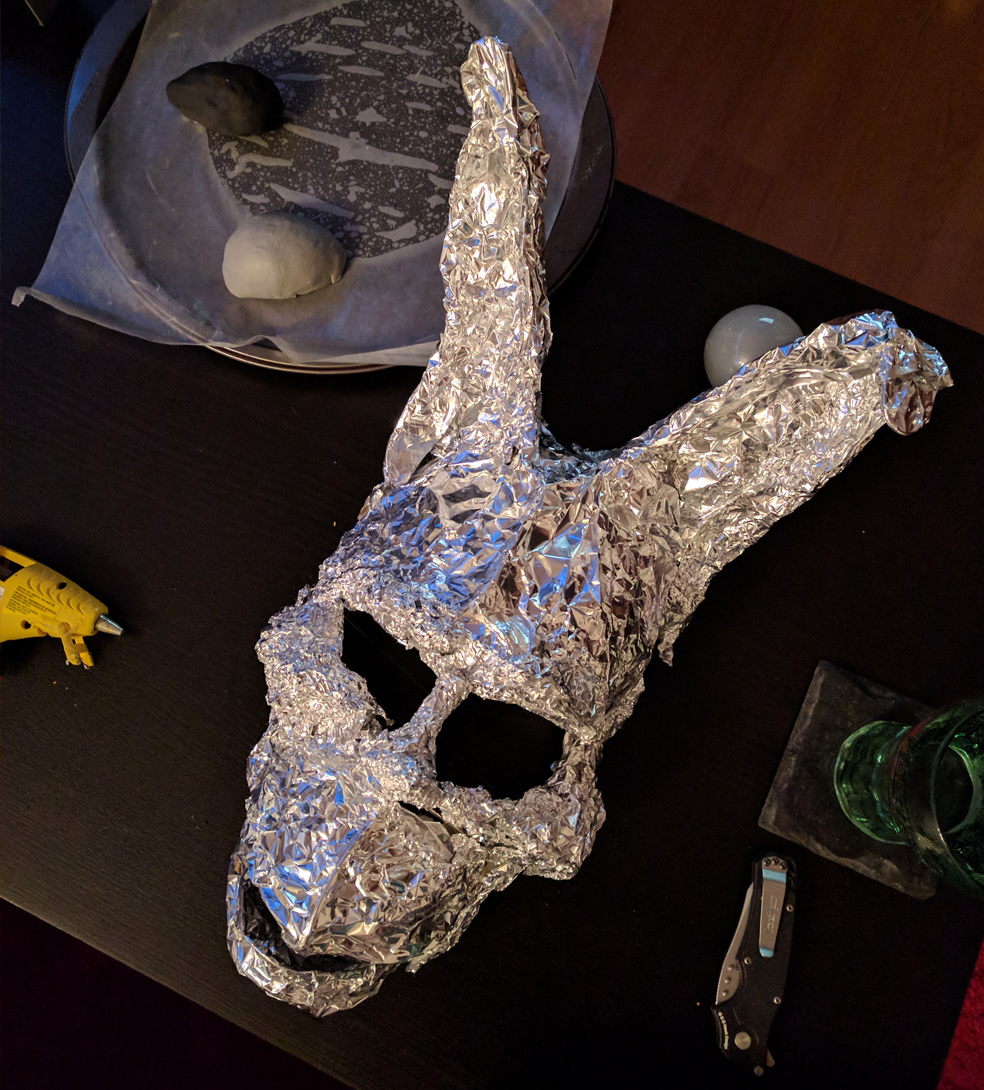
Next, I added mass with aluminum foil
Those lumps of grey and black in the background were how I tested and settled on making the eyes, respectively.

You can see one of the loops more clearly here
After some reading on the various polymer clay options, I settled on mixing silver and black Kato Polyclay (which I ordered from shadesofclay.com). This wasn’t the most time or labour efficient solution – which is an evasive way of saying it was the worst decisions of my life.
I spent hours mixing the clay, and my hands felt a bit bruised afterward. Keep in mind that I’m a large fellow with proportionally sized hands, and admirable grip strength, if the Telus World of Science is to be believed. In short, maybe don’t do it unless you really want to.
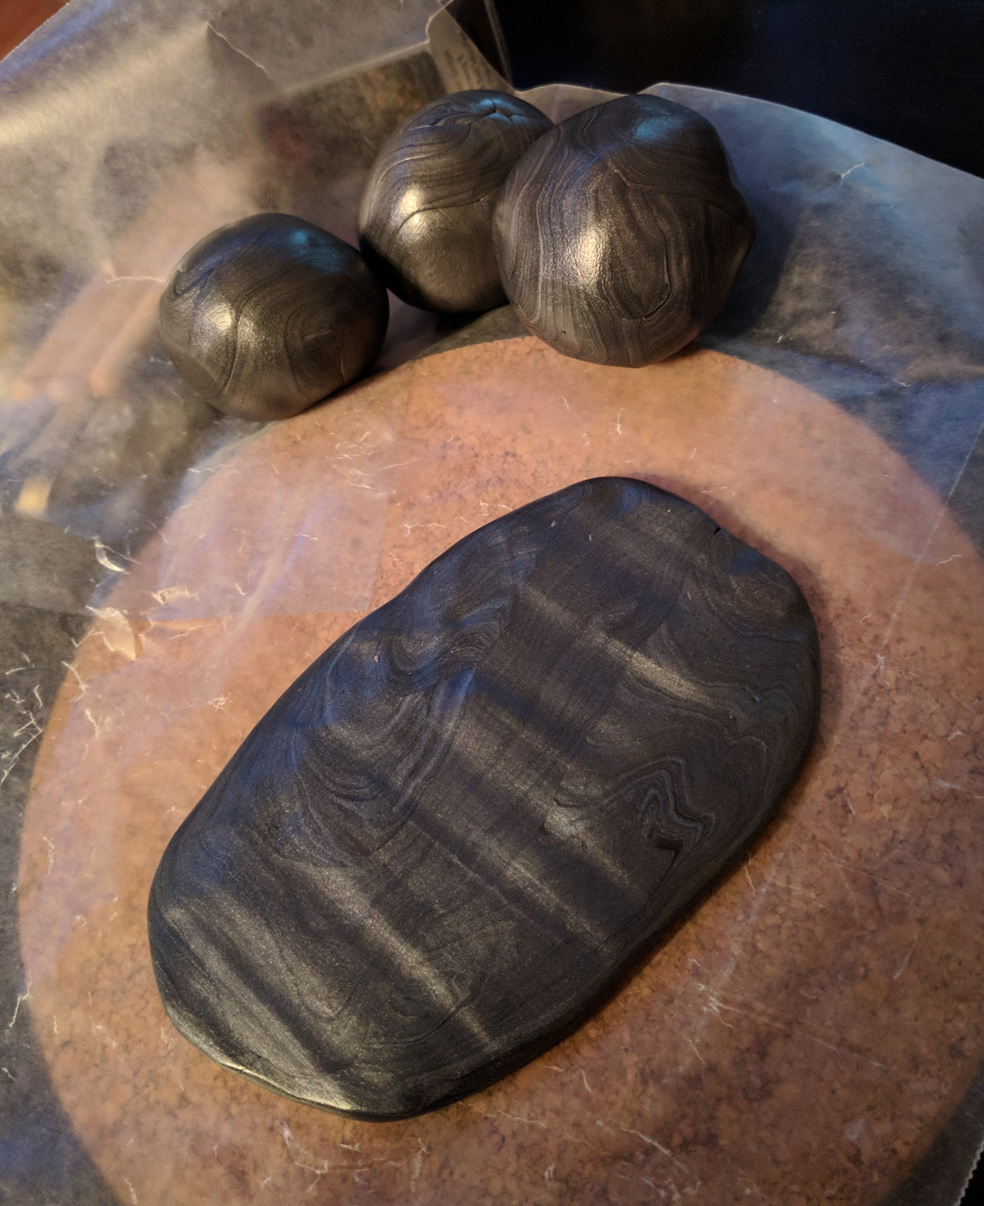
This is maybe a quarter of the polymer clay I mixed.
Because I wanted the eyes to light up, I made them with Pardo Translucent Art Clay. I made a form using a ball of tinfoil rough eye shape, covered in a layer of some black polymer clay I had leftover from my Witcher costume.
I cooked it in the oven, and then pressed a layer of the Pardo Translucent over it, and cooked that (times two).

Look, it's an eye!
Once a Pardo Translucent eye was cooked, I pulled it off the form. Conveniently, they came off pretty well – although the form was mostly destroyed after the second eye. Joke’s on it, though, Frank’s mask only has two eyes.
With the eyes complete, I set about the tedious task of skinning the mask. I did this over two days.
I’m not sure if it was necessary, but during the night I stored the excess clay in the fridge, and wrapped the mask in plastic – just in case.
Skinning the mask
A little bit of dentistry
Guys, I have a confession to make. Before, when I told you I started with the mask.. Well, that wasn’t entirely true. I started with the teeth.
I hope you can forgive me.
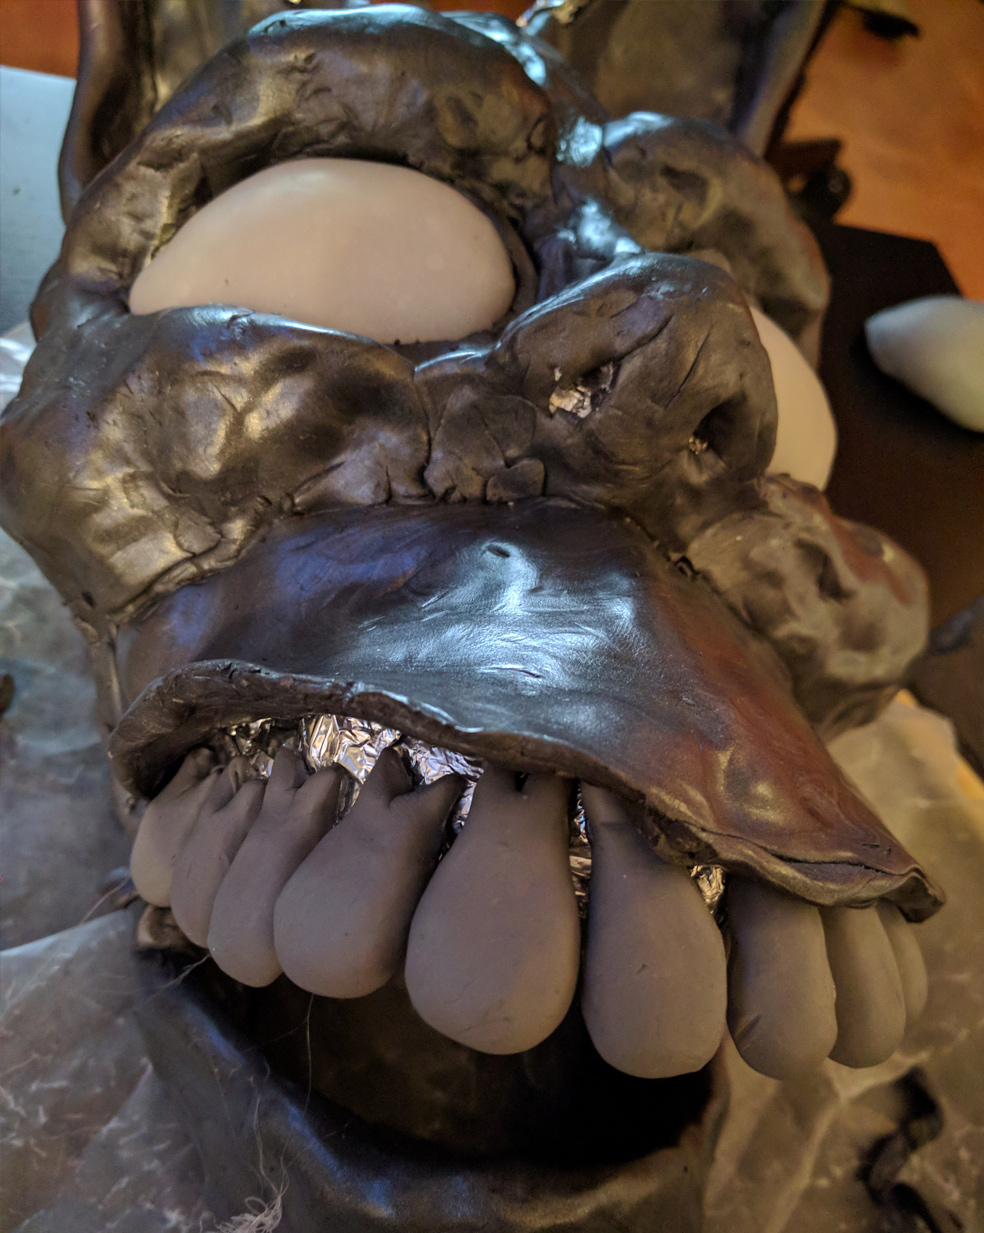
Doing a little dentistry
It turns out the trick to successful dentistry is surface area and hot glue.
I’d originally included the roots on the teeth to provide extra surface area, and to help prevent the teeth from falling out. It turns out this had the added benefit of cool bumps above the teeth – kind of like metal gums.

Skinned and ready to cook
With the mask both skinned and toothed, it was time to cook it – and boy was I nervous.
Luckily, it almost fit in my filthy oven. There’s a bit of a flat spot on the top of one ear, and at the bottom of his chin, where it touched the back wall and the oven door, respectively. I probably should have actually measured things before hand. Oh, well – I doubt anyone else would even notice.
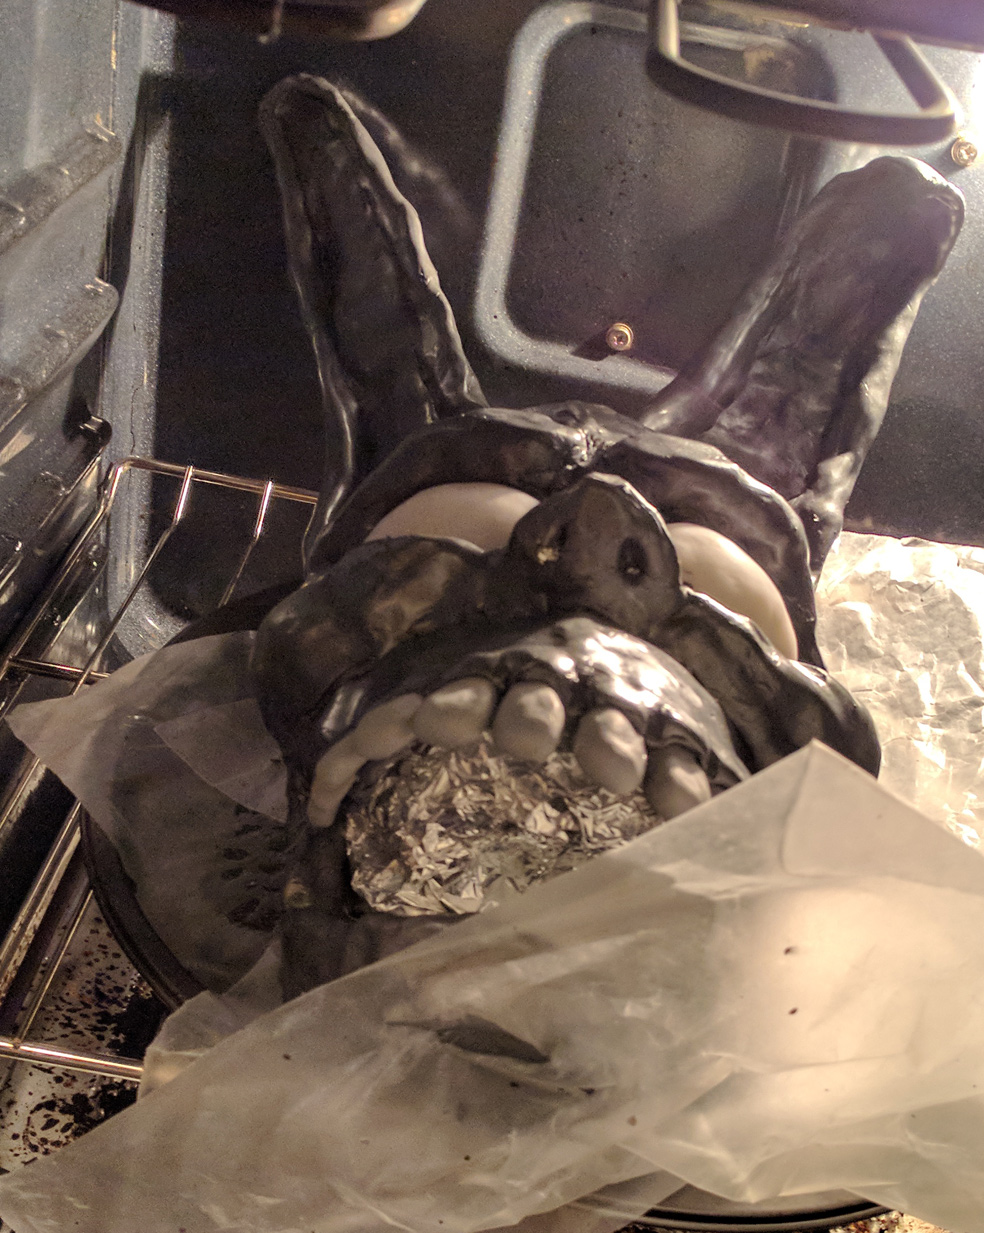
I put two balls of aluminum foil inside it for support
Now, you’re probably thinking but, hey, how will you see?
Now that is a great question. When I was planning the mask, I decided I didn’t care about vision. I could look down and see through the mouth, or flip it up on my head if I really needed to see something.
I didn’t plan to move around much while wearing it.
At the last minute, (probably because people kept asking) I started to worry I’d made a terrible mistake. Panicked, I poked a tiny hole near one eye to look through. It worked fairly well, though I can only see one face at a time.

Bonus, I later learned that the neck of a corona bottle fits perfectly through the mask's mouth and into my own.
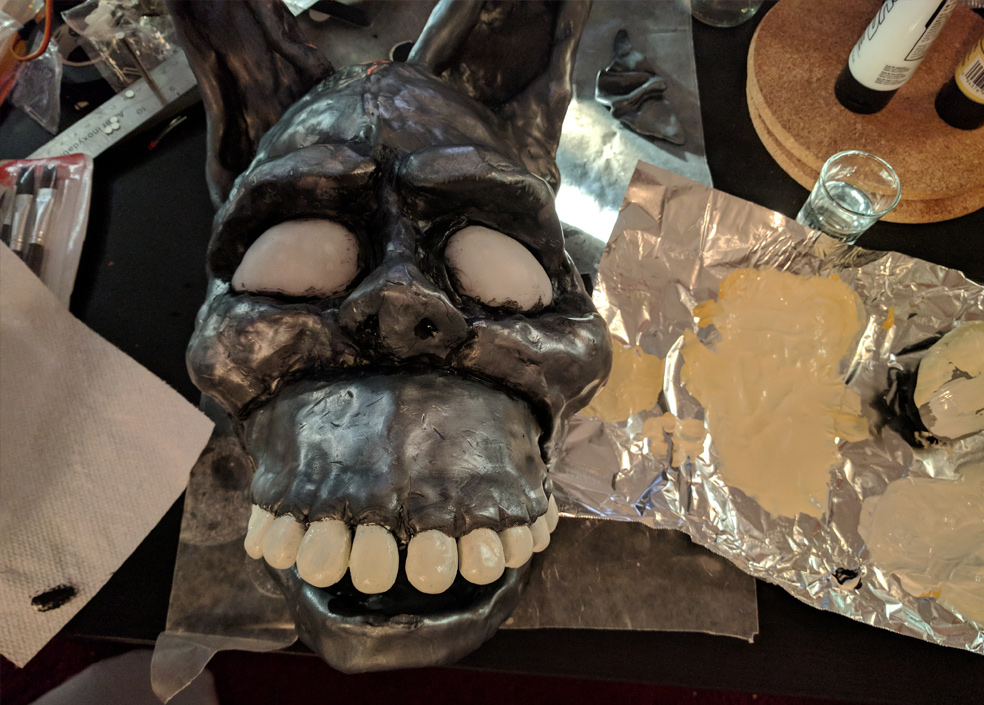
Once the polymer clay was hardened, I finished it with some paint and silver leaf Rub n’ Buff. Turns out it was super difficult to paint. The acrylic just seemed to run over it. I ended up eventually cleaning it up with a bit of acetone. The Rub n’ Buff was just as cool as always, though.
A bit of acrylic, and a bunch of Rub & buff. (Don't worry that glue gun isn't plugged in)
At this point, the inside was still aluminum foil, so I covered it with craft foam. This served the dual purpose of making it easier on my face, and more importantly, making it look better.
I also added some foam padding for comfort.

Whoa comfy (Here you can see the elastic loops again)

Oh, speaking of the elastic..

It's a little big on Dayna
I put off painting the teeth for quite a while. I wasn’t sure if I wanted to do it, and I was happy enough with the mask that I was worried about ruining it. In short, I was nervous.
I don’t have a lot of experience mixing paints, but I had a very particular colour in mind. I probably spent an hour just mixing and testing colours, trying to get that perfect shade of bone-white. (The trick was to add a bit of black.)
Eventually I got down to it, though.
teeth whitening
But what if the eyes glowed?
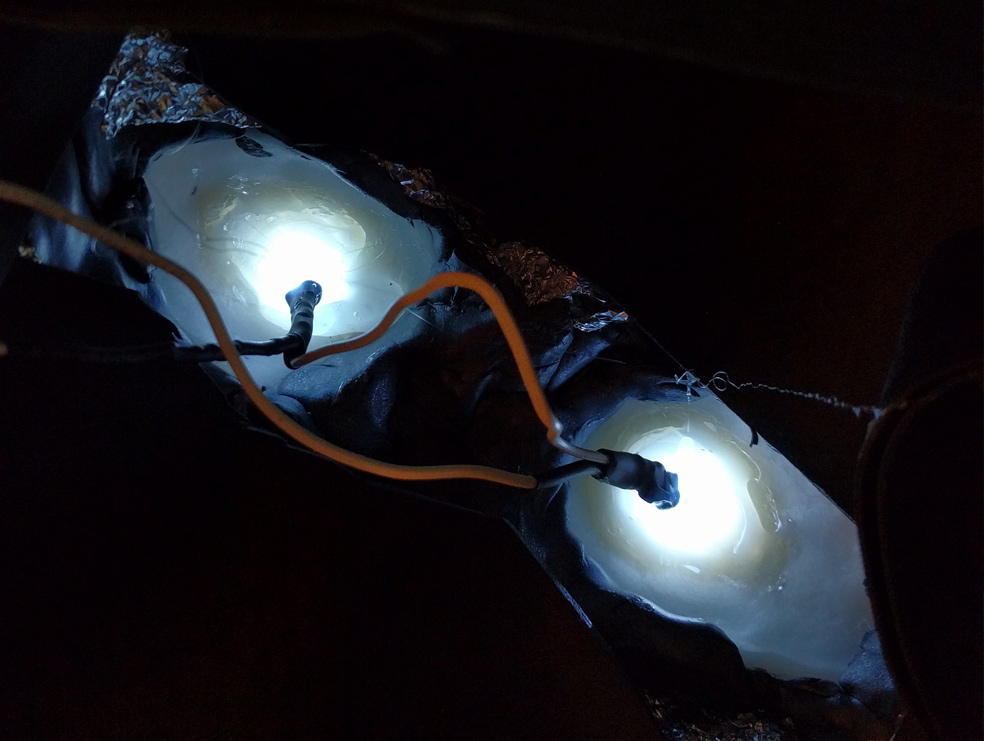
I wanted the eyes to glow – but only sometimes. I wanted it to be sneaky.
After testing a bunch of different LEDs, I settled on white (I got them from bc-robotics.com). They ended up looking a little bit blue, but that’s okay.

So I got to soldering, which I hate. I think you can see the despair in my eyes.
In order to diffuse the light, I made a sort of cup of wax paper, and melted hot glue into it. I embedded each LED into one of the globs, and then glued them into the eyes.
From there extended a long wire. Long enough to travel down my sleeve toward my hand. It ended in a switch, which allowed me to turn the eyes on and off at will, with nary a motion.
That is, if I had a sleeve.
A bunny onesie
With the mask complete, it was time to work on the bunny suit. I wanted a pretty basic onesie, loose and long-limbed. Being too lazy to even look for a pattern, I just went for it.
I found some cool fabric when I was in Victoria, though I wish I’d gotten more. It turns out I had just barely enough. The hood is actually made of scraps.
Rabbit pants Starting the shirt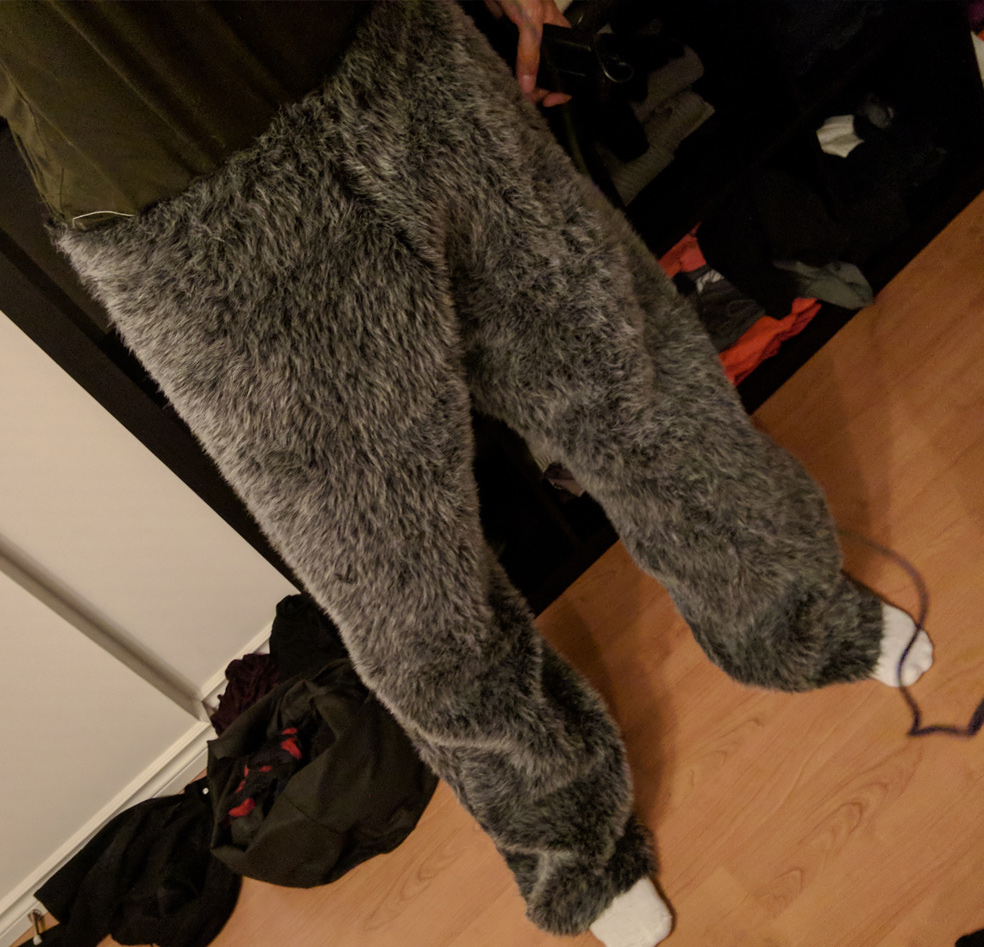
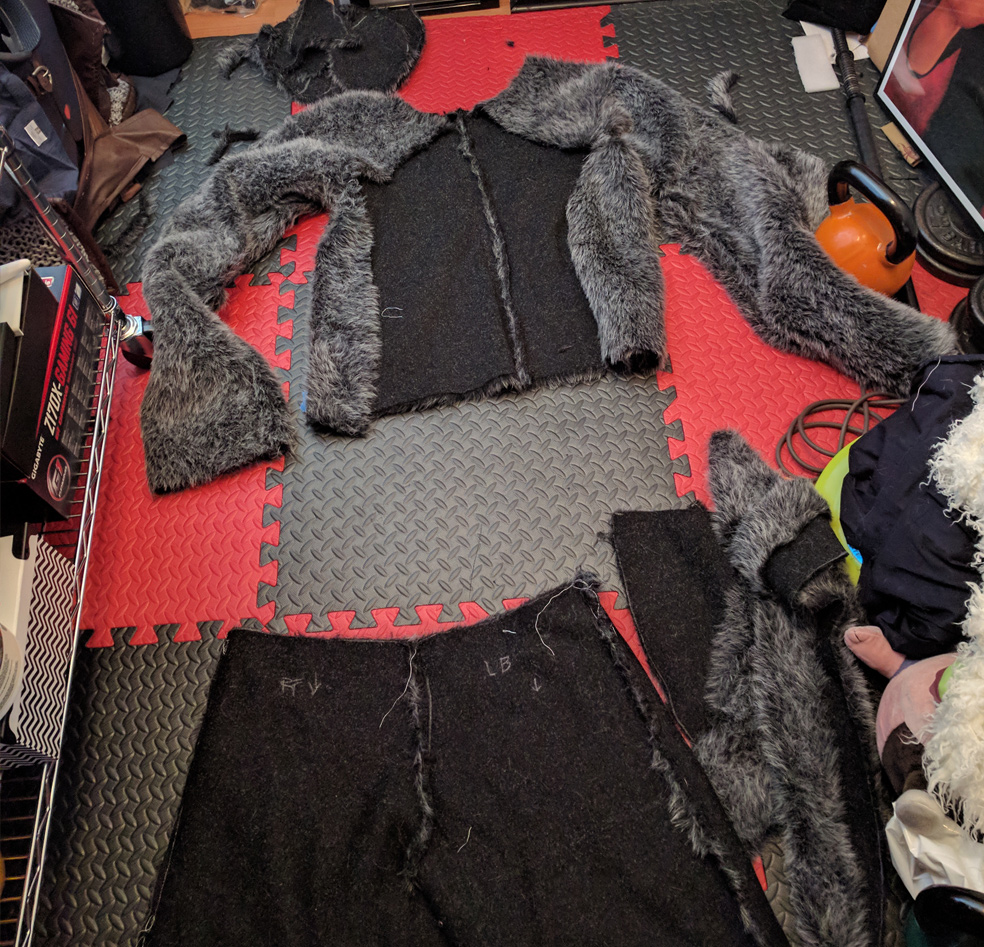
I wanted it to velcro at the front, where the white and grey fabric meet.

Almost there!
All that was left was to add the hood!
To help the hood stay in place, I used magnets to attach it to some metal on the mask’s upper-most elastic. This didn’t work as well as I’d hoped. I should have used more magnets, but I left that portion until the last minute. Oh well.
The end result
With the eyes off

With the eyes on

Here it is on instagram: